Article
How to Integrate Photogrammetry in Digital Workflows for Guided Full-Arch Rehabilitation
Aug 1, 2025
In the ever-evolving field of implant dentistry, technological advancements have consistently paved the way for improved patient outcomes, more efficient workflows, and enhanced precision in complex procedures. A notable example of such advancement is the integration of dental photogrammetry into full- and semi-digital workflows for guided full-arch rehabilitation surgeries. This article aims to delve into the concept of dental photogrammetry, explores its applications in full-arch rehabilitation, and highlights the benefits of embracing a fully digital approach to these intricate and highly-demanded procedures.
What is Dental Photogrammetry?
Dental photogrammetry is a non-invasive imaging technique that involves capturing detailed 3D representations of dental structures using multiple photographic images taken from different angles. This technology, which has its roots in aerial surveying and cartography, has been adapted for dental applications to provide highly accurate digital models of a patient’s oral anatomy. By analyzing the geometric properties of the captured images, photogrammetry software can reconstruct a 3D model that serves as the basis for various dental procedures.
Understanding Full-Arch Rehabilitation
Full-arch rehabilitation refers to the process of restoring the function and esthetics of an entire dental arch—either upper, lower, or both—using an implant-supported prosthesis commonly referred to as “All-on-X”. This procedure is typically recommended for patients who have lost most or all of their teeth in one or both arches. Traditionally, full-arch rehabilitation involved a combination of diagnostic tools, manual techniques, and physical impressions to design and fabricate the restorations.
However, these conventional methods often posed challenges such as inaccuracies in impression taking, prolonged treatment times, and discomfort for the patient. The advent of digital dentistry has significantly transformed the landscape of full-arch rehabilitation, with dental photogrammetry playing a pivotal role in this evolution.
The Role of Dental Photogrammetry in Full-Arch Rehabilitation
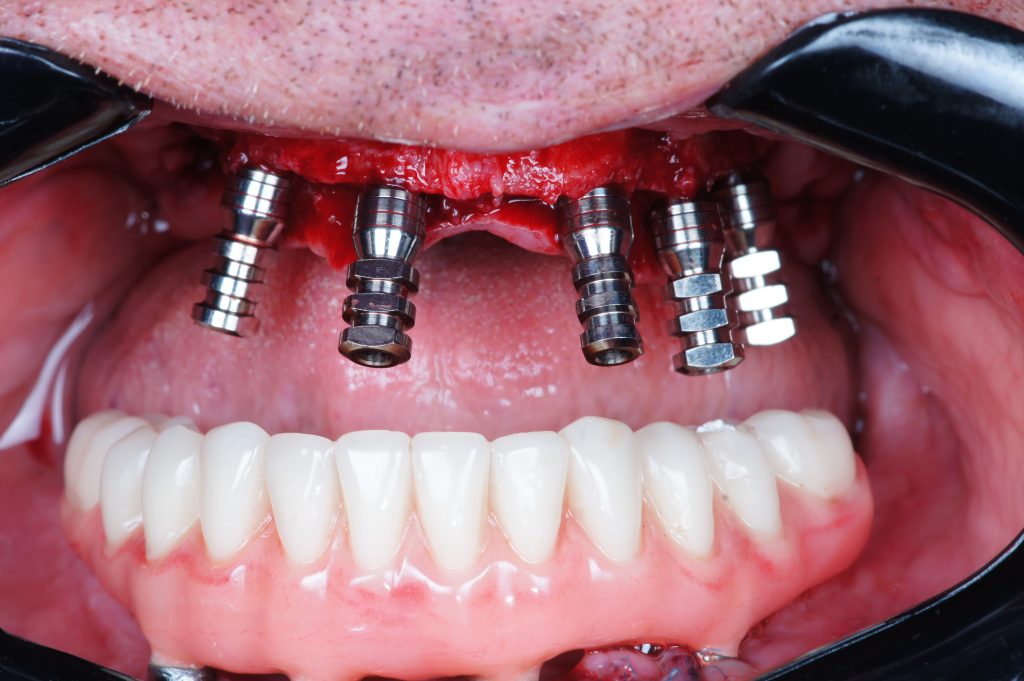
Photogrammetry serves as a valuable tool for capturing essential data about implant placement for All-on-X restorations. Specifically, specialized scan bodies are affixed onto the implant abutments, while a scanner records their position and orientation. Given that conventional methods of acquiring implant data for All-on-X restorations were either prone to inaccuracies or demanded significant labor and time, the adoption of dental photogrammetry systems (such as ICam4D by Imetric, MicronMapper by ClaroNav, and PIC system by PIC dental) emerges as a crucial advancement, facilitating the provision of predictable and efficient fully digital full-arch restorations.
If you have the option of 3D printing at your practice, you’ll be able to 3D print surgical guides as well as the prostheses. That way, you don’t have to wait for the lab to do it and you can do it yourself. Alternatively, you could outsource these steps to a service provider.
Photogrammetry Workflow
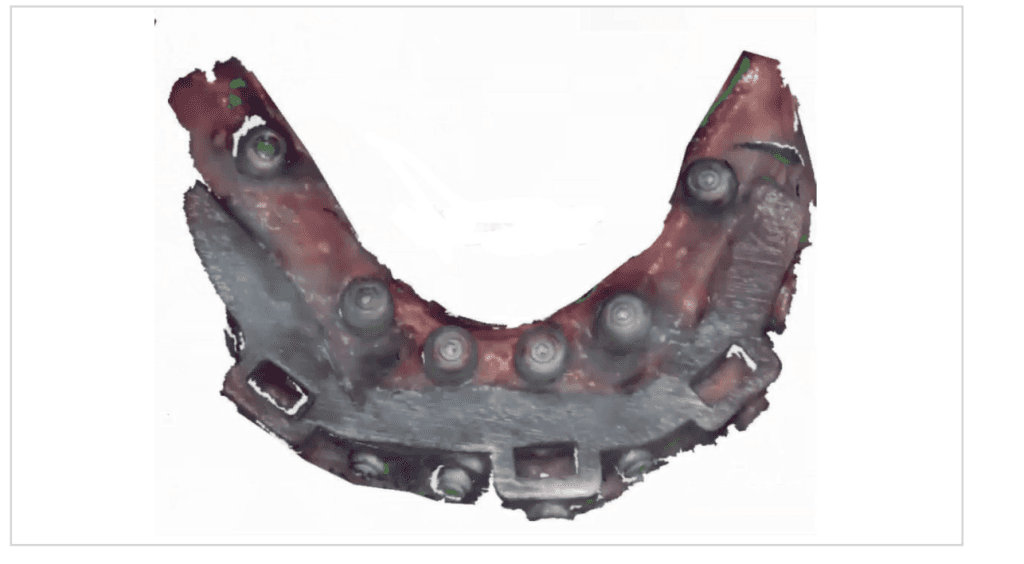
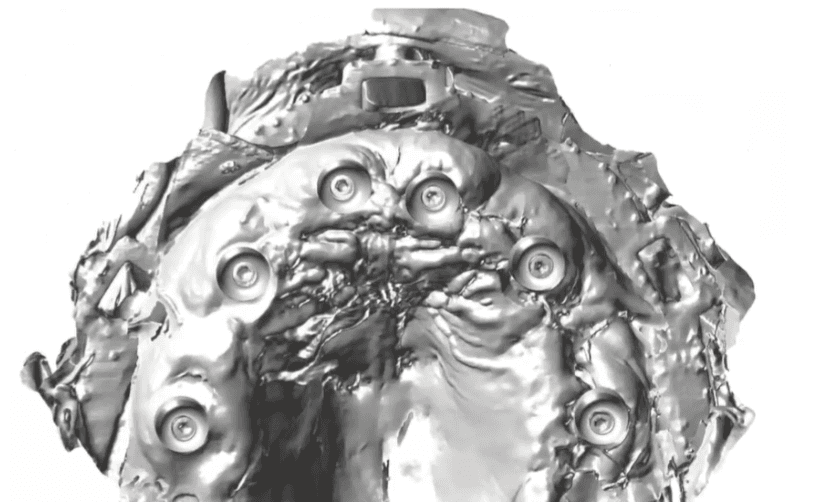
Photogrammetry technology enables us to capture 3D coordinate measurements by taking multiple photographic images, resulting in an accurate representation of the implants’ positions. These images use an extraoral receiver to capture the geometric properties of objects and their spatial locations. However, the limitation of this system is that photogrammetry does not capture soft tissue details, requiring a second STL file. In this workflow, photogrammetry records the implant positioning within an XYZ axis, while an intraoral impression or scan is performed to capture the soft tissues. The two scans are then combined to create the interim and/or final prosthesis.
Generally speaking, three different records are needed for full-arch surgeries using photogrammetry:
Preoperative record
Photogrammetry record
Postoperative soft-tissue record (with MUA healing caps).

These records are then exported into a CAD software where they will be merged to facilitate the design of an All-on-X prosthesis. All three of these methods can be utilized to align data to help record the vertical dimension of occlusion (VDO) as well as establish the ideal tooth position.
Step 1: Establishing Ideal Tooth Position and VDO
Before implants are placed, we have to decide how to establish the ideal tooth position as well as maintaining the patient’s VDO. In digital workflows, this step is essential to achieve accuracy. The following techniques can be employed:
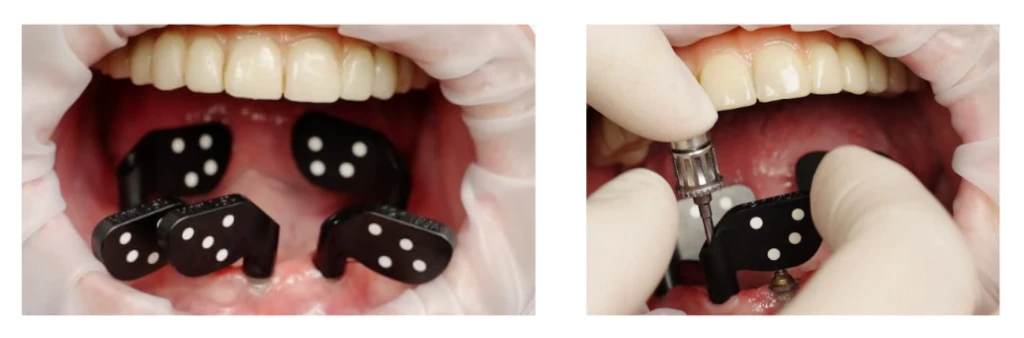
Fiduciary markers can be used to help correlate pre- and post-operative surgical data. These markers are placed within the oral cavity before surgery and remain in place until after the soft tissue record is obtained following implant placement. Because the markers remain in a fixed position throughout the procedure, they allow for the seamless merging of pre- and post-surgical data.
It is recommended to use at least 2-3 fiduciary markers per arch. In the maxilla, markers are typically placed in the palate to avoid interfering with the surgical procedure. In the mandible, markers are generally positioned bilaterally in the retromolar pad area. The surface of each fiduciary marker should have a distinct feature, such as a Phillips head, that can be easily identified during an impression or scan. Tent screws are ideal fiduciary markers because they provide stable placement and are clearly visible in intraoral impressions or scans. The VDO is maintained by obtaining an accurate impression (using materials like PVS, polyether, or an intraoral scanner) of the markers before and after surgery, allowing both data sets to be accurately aligned.
Pro Tip: If you’d like to use this modality, the Anatomic Guide® can turn into a reference marker. This procedure is particularly recommended for the lower arch cases where it’s hard to get a reference mark, unlike the upper arch where you can keep the palate screws in place. Maintaining a reference on the mandible is really challenging. Guided surgery would be the better option there because the guide becomes the reference.
Existing Denture
The patient’s existing or immediate denture can be utilized to help maintain the VDO. After implant placement and the photogrammetry recording, MUA (multi-unit abutment) healing caps are placed on the implant abutments. A reline impression is then taken using the patient’s denture. The denture is scanned 360° to capture the soft tissue registration from the reline impression, the positions of the MUA healing caps, and the denture’s tooth setup and bite registration. In the CAD software, these scans are imported as two separate files: the preoperative wax-up and the inverted soft tissue scan. By inverting the intaglio surface of the denture scan, a soft tissue model with the MUA healing caps is created. This scan can then be merged with the photogrammetry data, providing an accurate representation of the implant positions, soft tissue contours, and the patient’s denture tooth setup at the correct vertical dimension.
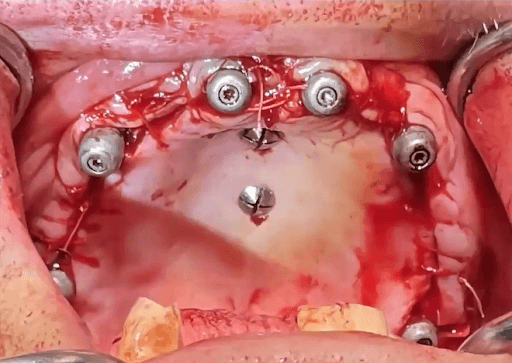
Step 2: Photogrammetry Scan
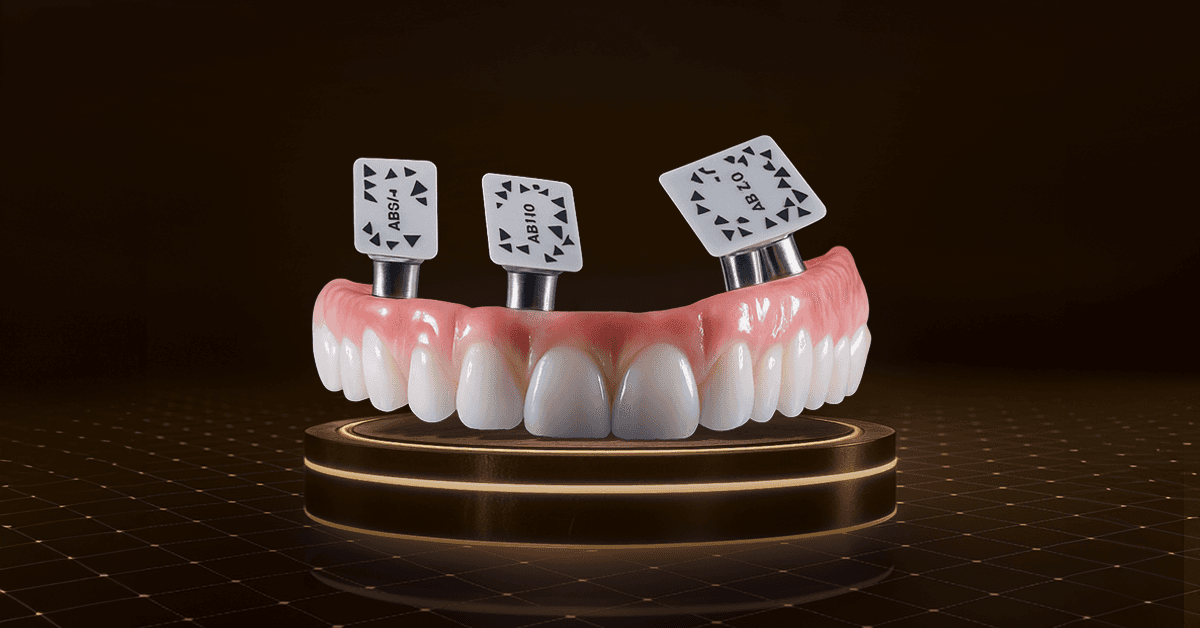
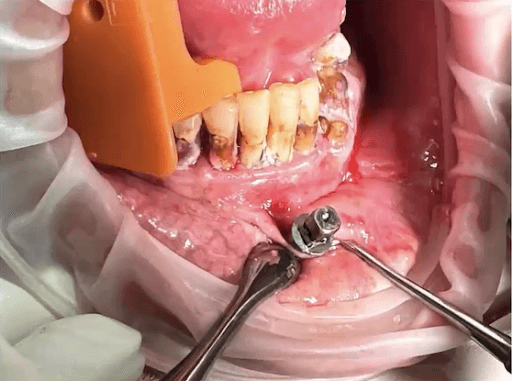
Every photogrammetry system has its own photogrammetry scan bodies (e.g., PICtransfers, iCAM bodies, MicronMapper ScanBody) which are encoded with targets that allow the camera to transpose multiple images to locate the precise position of the implant. The scan bodies are attached to the MUAs, and X-rays are taken to verify the seating of the scan bodies, especially for angled or deeper MUAs.
Once seated and verified, they need to be oriented in such a way that allows as many targets as possible to be visible. The photogrammetry unit then captures the implant positioning by locating the targets on the scan body via an extraoral camera. The number of targets on the scan bodies, the type and number of cameras, and the method of obtaining images is different in each photogrammetry system.
The photogrammetry camera is positioned approximately 10 inches away from the scan bodies, at a maximum angle of 45°. As the camera rotates, images are captured in a continuous fashion until the software verifies sufficient data has been obtained. The software signals when sufficient information has been recorded by changing the scan body color from red to green. In most cases, this step can be done in less than 30 seconds.
Step 3: Prosthetic Design and Fabrication
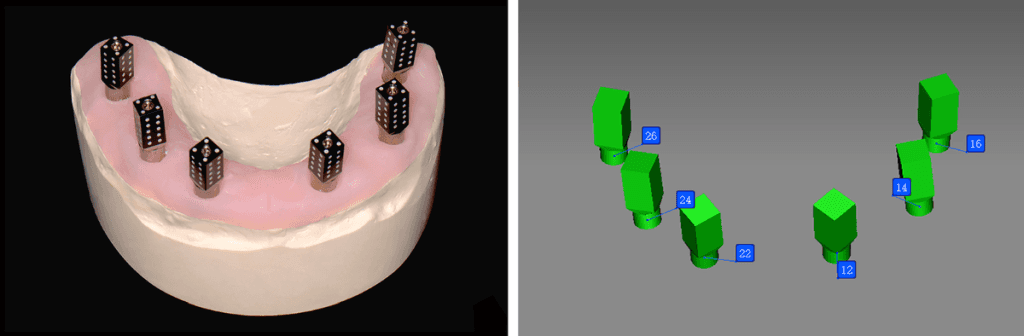
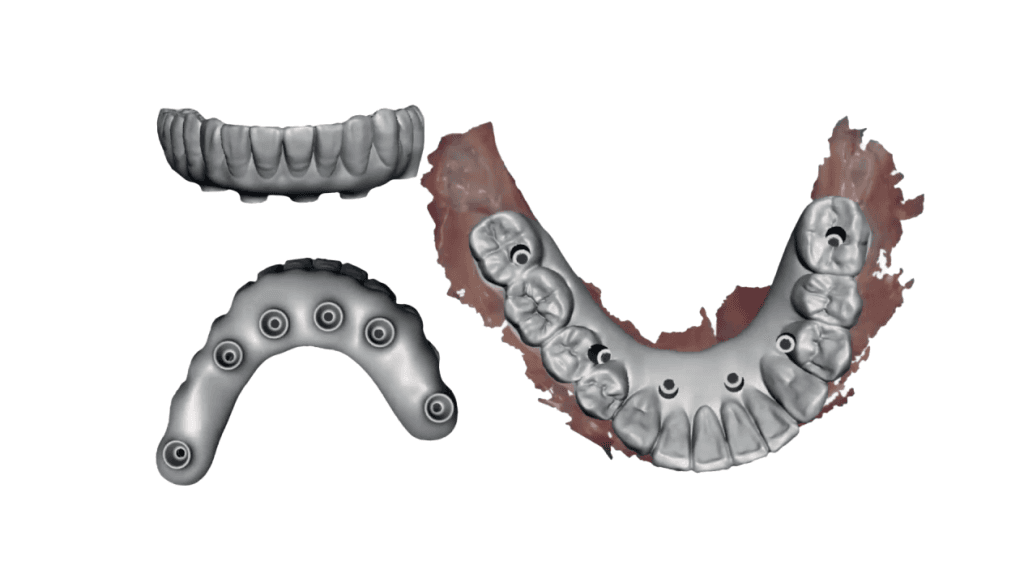
Once the photogrammetry scan is complete, a digital file extension (STL file) is created that contains all the interrelated information on implant geometries, interfaces, healing abutments, and screws. This data can then be uploaded to CAD software to allow for digital alignment pairing and designing of the prosthesis.
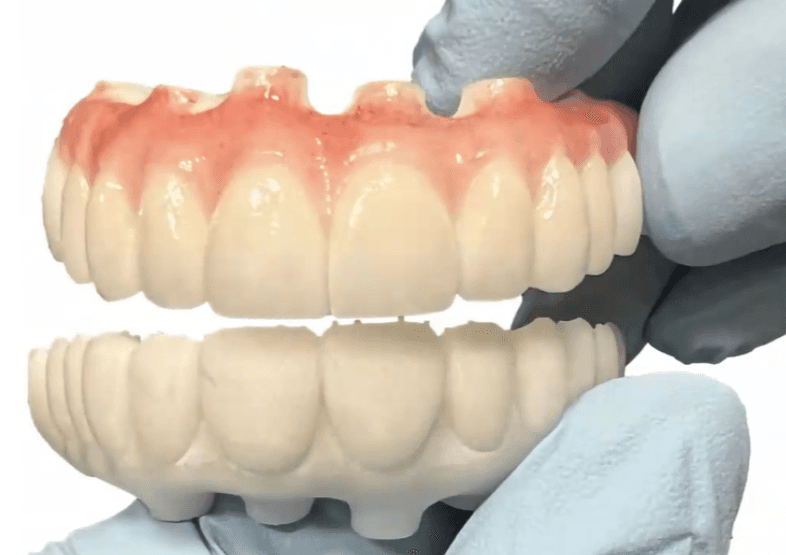
All data sets are aligned within the CAD software, and the patient’s immediate full-arch prosthesis is designed. We have the option of designing and fabricating a prosthesis that inserts directly to the multi-unit abutment, without the use of a titanium cylinder or Ti-base. This is different from conventional denture conversions and stackable surgical guides. With this, special abutment screws are utilized that have intimate fit within the prosthesis. All of these parameters are determined and specified within the design software.
The Future of Dental Photogrammetry and Digital Workflows
The future of dental photogrammetry and fully digital workflows in full-arch rehabilitation is promising. As technology continues to advance, we can expect even greater improvements in the accuracy, efficiency, and accessibility of these procedures. Innovations such as artificial intelligence (AI) and machine learning may further enhance the capabilities of digital dentistry, enabling even more customized and effective treatment plans.
Moreover, the increasing adoption of digital workflows across dental practices worldwide suggests that these technologies will become the standard of care for complex procedures such as full-arch rehabilitation. As more dental professionals embrace digital dentistry, patients will continue to benefit from improved outcomes, reduced treatment times, and a more comfortable overall experience.
Summing Up
The integration of photogrammetry and 3D printing has provided us with an alternative workflow option for full-arch prosthetics. This fully digital approach is now available for immediate loading procedures. Photogrammetry technology allows for the quick, efficient, and precise calculation of the position and orientation of multiple implant interfaces. It is the most accurate digital method for determining the placement of multiple dental implants, particularly in full-arch cases. By instantly creating a digital file, this method reduces the need for multiple steps and materials, reducing the potential for errors, saving time, reducing the number of patient visits, and minimizing discomfort.
While adopting a digital workflow can seem daunting, a solid understanding of foundational implant dentistry and traditional analog methods is essential for effectively applying these new digital techniques. In 3Sixty Academy, we incorporate these digital methods into our surgical, prosthetic, and hands-on curriculum. Attendees receive comprehensive didactic and practical training in photogrammetry and digital workflows. By teaching these advanced techniques alongside the basics of guided surgery, we help clinicians successfully integrate this technology into their practices.
Ready to streamline your workflow? Submit your case, ask a question, or explore partnership options — our team will get back to you within one business day.